Pages

Tuesday, April 23

Quinoa and Sausage Stuffed Bell Peppers

Quinoa is a magical little grain that you can find in just about every market these days (or at least here in California). It easily replaces rice in most recipes, which is how I came up with the idea for these ay-may-zing sausage and quinoa stuffed bell peppers. 
A few of the ingredients you'll need.
I boil my peppers, but you could steam them if you have a big enough basket. I don't like soggy peppers, so I usually don't cook them for more than about 5 minutes. To cut them, just use a paring knife and carve the stem out like you would a pumpkin. Pull any remaining ribs and seeds out by hand.
This is one large, fresh italian chicken sausage with the casing removed that I got from the meat counter at my local Sprouts. Brown it along with onions and garlic. Deglaze the pan with a splash of white wine.
Then add cooked quinoa, your favorite marinara sauce (mine happened to be homemade) and some parmesan cheese.
Fill each pepper and top with a healthy helping of more parmesan.
Bake in a 350 degree oven for about 30-35 minutes. If you like a little crust on the top, broil the cheese until brown and bubbly. Serve with some good Italian bread.

Quinoa and Sausage Stuffed Bell Peppers

1 C uncooked quinoa
3-4 green bell peppers, tops removed
1 large or 2 small Italian sausages, casings removed
1 small yellow onion, chopped
1 clove garlic, minced
1/4 C good white wine
1 jar marinara or tomato sauce of your choice
1/4 C parmesan cheese, plus more for sprinkling

Cook the quinoa according to package directions (I do mine in a rice cooker). Meanwhile, boil or steam the peppers. Drain the peppers on a kitchen towel once they are cooked. In a large, oven safe pot, heat about 1 tsp. olive oil over medium heat. Add the onion and cook a few minutes until it starts to become translucent. Add the sausage in, breaking it up with a wooden spoon as it cooks, then add the garlic. Once the sausage is no longer pink, splash in the white wine. Turn the heat down and add the marinara sauce. Simmer for about 5 minutes, then turn off the heat and add the cooked quinoa and parmesan cheese. Stir until the quinoa is coated with the sauce. Push the sausage/quinoa mixture to the sides of the pot, making room for the peppers. Place the peppers into the pot and fill with the mixture. Top with the remaining parmesan cheese and place in the oven for 30-35 minutes. Serve immediately.

Enjoy!

Wednesday, April 17

Chicken, Date and Goat Cheese Salad

The return of Spring always reminds me of how much I look forward to Summertime each year. And as the sun warms up a little more each day, and markets begin to carry all kinds of fun produce, I get a hankering to eat salad for dinner once again. 
This salad is based on one of my local restaurants that makes amazing rotisserie style chicken, which is what makes this dish so delicious. I like to use a combination of red leafed lettuce and butter lettuce, which are both normally available pre-washed in bags to save you a little time.
The dressing is so easy to put together and you probably already have all of the ingredients in your kitchen.
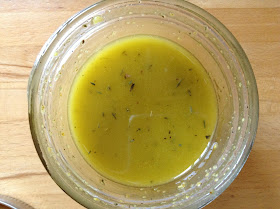
Throw everything into a little jar, tupperware or bottle and shake away. 
You'll end up with a beautifully creamy, slightly sweet and sour dressing that tastes good on any salad. 
The salad will sit well undressed for a few hours or up to overnight (if you like leftovers for lunch), just leave out the avocados until the last minute.

Chicken, Date and Goat Cheese Salad

1 store bought Rotisserie Chicken (use whichever meat of the chicken you prefer, you'll need about a cup)
1 lb bag or 1 head of your favorite lettuce
10-15 cherry tomatoes cut in half
1/2 C frozen corn, thawed and pat dry
1/2 an English Cucumber (the ones wrapped in plastic wrap) cut into small pieces
6-7 pitted dates, chopped into small pieces
1/4-1/3 C walnuts or slivered almonds, chopped
1 avocado, cut into cubes
1/2 a tube of goat cheese, crumbled

In a large bowl, layer all ingredients starting with the lettuce followed by the remaining vegetables, then the nuts, dates, chicken and cheese. Cover and keep refrigerated until ready to eat. Toss with the dressing and serve.

Dressing

1 T spicy brown mustard
1 clove garlic, minced
3 T fresh lemon juice
1 tsp. apple cider vinegar
1 tsp. brown sugar
1 tsp. herbes de provences or italian herbs
salt and pepper to taste
1/4 C olive oil

Place all ingredients into a tightly sealed container and shake to emulsify. You can double this recipe to use on other salads, it will keep in the fridge for a few weeks. If it hardens, just place the sealed jar into a bowl of hot water until the oil liquifies again.

Enjoy!

Friday, April 12

Deliciously Easy Tomato Soup

Remember when you were little and it was a bit cold outside and someone made you a grilled cheese sandwich with tomato soup? Remember how the bread was a little bit greasy and the cheese was perfectly stretchy? Remember dipping the gooey sandwich into a warm bowl of what basically amounted to marinara sauce? Me too. You've most likely already mastered a good grilled cheese, but have you found that perfect tomato soup to go with it? The one thats slightly textured, creamy and full of flavor? Look no further.
This is all you need to make my favorite tomato soup (plus a little salt and pepper and a pat of butter). Start by chopping the onions, celery and carrots. Get them cooking over medium heat in a soup pot with a little olive oil. Toss in your chopped garlic when the veggies start to get tender and translucent.
Pour in a can of good tomatoes. This is the most obvious flavor of the soup, so splurge with the extra dollar or two and go for the san marzano style tomatoes. Turn the heat down to simmer the soup.
Add a heaping handful of torn up basil, followed by a bit of salt and pepper to taste (start with less, you can always add more). Add about 1/2 C chicken (or vegetable) broth. Allow the soup to simmer about 10-15 minutes. Then, get out your hand emulsion blender.
Blend the soup (careful - it can splash!) until you reach your desired consistency. It should look somewhat like this after you've added in the cream and butter.
Serve immediately with your favorite grilled cheese, panini or crusty bread. This soup actually doubles as a marinara sauce if you leave out the broth, add in some parmesan cheese and cook it down a bit longer.

Deliciously Easy Tomato Soup

1 small to medium yellow onion, chopped
2 carrots, peeled and chopped
3 celery stalks, chopped
1-2 cloves garlic, minced
1 24oz can San Marzano whole, peeled tomatoes
1/2 C chicken broth
1/4 C heavy whipping cream
1 T unsalted butter
salt and pepper to taste

Heat a soup pot or dutch oven over medium heat with 1 T olive oil. Add the first three veggies into the pot and cook until they become slightly brown and translucent. Add the garlic, cook for one minute more then add the tomatoes and turn down the heat. Toss in the torn up basil, salt and pepper and broth and simmer for 10-15 minutes. Blend the soup using a hand blender or by scooping it into a regular blender in batches. Finally, add the whipping cream and butter. Taste the soup and adjust the salt level if necessary. You can certainly double this recipe if you need to serve more than 4.

Enjoy!


Wednesday, April 3

Brownie Ice Cream Pie

A few weeks ago I was challenged with making my brother his birthday dessert, which he requested be a surprise. I wanted to make something I knew he would truly love, but that was special enough to sing over. And this easy and sinfully good Brownie Ice Cream Pie was born.
I started with a delicious brownie recipe from Baked bakery in New York that I found via Pinterest. It is super chocolately and perfectly decadent.
Adding to the decadence of the chewy brownie, is the top layer of Vanilla ice cream, crumbled oreos and chocolate ganache.
This is what birthdays are all about. 

Brownie Ice Cream Pie

It's important that you use the best ingredients possible for this recipe. When making the brownies, choose high quality butter and chocolate or the best boxed mix available(such as Ghiradelli) . I chose to use Haagen-Dazs Vanilla ice cream, but you could use any flavor you want from Mint chip to Coffee. If you have the time, homemade ice cream would really add to the specialness. It's also best to make this ahead of time, I made this a day before my brother's birthday party.

Ingredients:
1 recipe for brownies (here's the one I used-which I split into two round pie plates) 
1 pint of really good ice cream
1 C crushed oreo cookies (mini or regular oreos work)
1/2 C chocolate ganache (recipe below)

Bake the brownies in a greased and lined pie plate. Allow the brownies to cool completely, which will take anywhere from 1-2 hours. Once cooled, take the ice cream out of the freezer and allow to sit for about 15 minutes to soften. Scoop the ice cream onto the brownie and using a spatula, spread it over the entire thing. It's ok if the ice cream is melting in some places, it will just re-freeze later. Sprinkle the ice cream with the crushed oreos and a dusting of ground cinnamon for an extra punch of flavor. Place the pie into the freezer to set for at least 3 hours or overnight if possible (cover it with plastic wrap once it begins to set). Make the chocolate ganache, spoon into a small plastic bag and snip off a small corner. Squeeze stripes of the ganache over the pie. Return to the freezer and keep the pie frozen until ready to eat. Remove from the freezer about 10 minutes prior to serving, using a hot knife will help to cut the brownies easier. 

Chocolate Ganache

1/2 C heavy whipping cream
4 ounces dark chocolate morsels or chunks

Heat the cream to a light simmer, watch it carefully to avoid scorching. In a heat proof bowl, pour the warmed cream over the chocolate. Stir gently. The chocolate will begin to melt gradually, keep stirring until it becomes shiny and looks like chocolate sauce. Store in an airtight container in the fridge for up to a week.  

Monday, April 1

Homemade Bourbon Vanilla Extract

Think Madagascar Bourbon Vanilla actually has Bourbon Whiskey in it? I did too, until I decided to make my own. After a little bit of research, I learned more than I ever intended about Bourbon and its origins.


In the 16th century, the House of Bourbon was a royal membership with French origins whose kings and monarchs ruled over many parts of Europe. They occupied a small Island off of the coast of Madagascar and called it Île Bourbon. This is where a portion of the worlds famed Madagascar vanilla beans are grown. The island has since been renamed Réunion, but still belongs to the French and still produces vanilla beans. Bourbon Whiskey is in fact named after the very same French House that founded Île Bourbon. In the late 1700s, territories in Louisiana, Kentucky and Virginia were given French names to honor Louis XVI for his aid in the American Revolutionary War. Bourbon County, Kentucky (originally Old Bourbon) is where Bourbon whiskey was first produced. Barrels of corn whiskey were sent down the Ohio river with the marking 'Old Bourbon' and in order to distinguish the difference in flavor from the already existing rye whiskey, the name Bourbon stuck.
How's that for a history lesson?

Here's the good news is: Not only can you make your own Madagascar Bourbon Vanilla, you can also use Bourbon Whiskey to make it. Most recipes I've seen call for vodka, but being that I am not a fan of vodka, I don't typically keep it stocked in my house. I did, however, have plenty of Maker's Mark.
You need just three things. Madagascar Vanilla Beans, good Bourbon and a glass jar or bottle. I used a ratio of 4 pods to 1 Cup of Bourbon. Try to buy the best vanilla beans available to you. I know they are pricey, but you will save more in the long run not having to buy expensive extract.
Score each pod with a sharp knife and scrape out the beans. Place the beans in the bottom of the jar, then place the pods in the jar and snip them into a few pieces using kitchen scissors. Fill the jar with the bourbon, screw on the lid and place it in a cool, dark place. Try and remember to shake it up a bit everyday and in about 4 weeks, you'll have your very own Homemade Madagascar Bourbon Vanilla. Just top off the jar as you use the vanilla and it will last for ages!

Enjoy!