Tuesday, January 28

Enchilada Stuffed Peppers

Stuffed bell peppers take me right back to my childhood as the dish was a frequent staple at my family dinner table. Combining the classic version with a Mexican twist is making this old favorite a new go to winter meal. 
Onions and bits of bell pepper get sauteed with garlic and olive oil.
Cleaned and hollowed bell peppers ready for their filling.
Cooked chicken makes this recipe super quick and easy. You could use rotisserie chicken, or any leftover cooked chicken you may have. On this particular night, I boiled mine.
When the peppers are done baking and the cheese is nice and gooey, top with a heaping scoop of guacamole and sour cream and everything is right in the world.

Enchilada Stuffed Peppers

4 Green Bell Peppers, tops & seeds removed (save the tops to cut up for the filling, avoiding the stem)
1 C quinoa, cooked (you could also use rice if you prefer)
1 large chicken breast, cooked and shredded(I like to boil mine in broth with 1/2 an onion, cilantro and a garlic clove for about 12-15 minutes or until the chicken is cooked through)
1 can black beans, drained and rinsed
1 C Mexican cheese
1/2 a red onion, chopped
2 garlic cloves, chopped
1/4 cilantro, roughly chopped
2 T cornmeal
4 C enchilada sauce (store bought or homemade, I adapted a recipe from Martha Stewart)

Heat oven to 350.
Place prepared peppers in a deep casserole dish. *For this meal, I did not boil the peppers prior to stuffing them. This yielded a slightly crisper result after baking. If you prefer super soft, tear apart peppers, boil or steam them for about 5-10 min or until they are a bit softer before continuing with the recipe.*
In a large bowl, combine cooked chicken, quinoa, beans, cilantro, about 1/2 C of cheese and salt and pepper to taste.
In a large nonstick skillet, heat 1 T olive oil over medium heat. Saute onions, the leftover bits of bell pepper reserved from the removed tops and the garlic. Cook for 5-7 minutes or until the vegetables are tender and browned. Add the veggies to the chicken mixture.
Mix in the cornmeal and 1 Cup of enchilada sauce.
Scoop the mixture evenly into each pepper, top with the remainder of the enchilada sauce, allowing it to pour over into the casserole dish. Sprinkle the rest of the cheese over each pepper.
Bake for 35-40 minutes, then turn the broiler on and broil the cheese until it is nice and bubbly, about 2-3 minutes.
Serve with guacamole, sour cream and tortilla chips.

Enjoy!

If you like this recipe, check out my other delicious version of stuffed peppers.


Saturday, November 23

Perfect Thanksgiving Flowers

Sure, the largest part of the Thanksgiving table will be taken up by Turkey, stuffing and whatever other traditional dishes your family whips up, but don't forget to make that food look even more appetizing by surrounding it with some beautifully fall colored flowers. 
I made these arrangements using flowers I bought in a local gourmet market. If you happen to have a good floral supplier nearby, they often have a large selection of many different varietals to choose from. I also like to check out larger Trader Joe's markets as they generally have some beautiful flowers for great prices. You can also stop by your local farmers market to see what's growing nearby.
I knew I wanted fall colors to be highlighted in this arrangement and I was thrilled to find some orange Stargazer lillies, which I have never even seen before. From there, I chose white roses to fill in the larger gaps, then rust colored mums and tiny orange and yellow daisies to add texture and variations of size. Finally, I added in some neat stems of burgundy colored berries and leaves to add some height.
Making three different sizes of arrangements makes them easy to place around the table and gives the illusion of having a lot more flowers. I also find it easier to create a few small ones, rather than one giant one. Remember, you never want your flowers to obstruct your view across the dinner table, so short vases are ideal.

I hope this inspires you to create something beautiful for your holiday table! Enjoy!

Saturday, October 26

A few things to inspire: Fall Edition


We all spend endless amounts of time online, and the things that most often grab our attention are the photos we flip through. Whether you like Instagram, Pinterest, Facebook or simply Yahoo, photos drive so much of our creativity and inspire us to take even more photos. I decided to bring some of the photos I've seen together into one little board that I can re-reference when I need a bit of inspiration. Of course I'm not the first to do this, but I felt doing so may help streamline some of my ideas and further them into becoming reality. If you'd like to make one of your own, or see where I created mine, check out Polyvore.com, and amazingly simple and free website where you can begin collecting all sorts of images to inspire you. 
Inspiration Board
This board is an obvious showcase of how much I love ornate and intricately designed things. From henna, to beadwork, I just can't get enough detail. The headpiece, lace shoes and art deco diamond ring will inspire me while I'm shopping for some fall pieces to add to my wardrobe. The eiffel tower and beautiful purple stained glass church remind me to travel and see somewhere new, while the McQueen clutch and Silvery grey Essie nail polish (in Cashmere Bathrobe) encourage me to dress up for the holidays. What inspires you? Where do you want to go? Keep searching for the things that inspire you most and let them do their work! :)

Friday, September 27

Chocolate Chip Coconut Protein Bars

To me, protein bars are quite overwhelming. I picture myself standing in the market in front of a wall of colorful boxes with words like 'spirulina' and 'supergreen' and 'macro' all vying for my attention. Which ones are actually good for me? Will I be hungry 20 minutes after I eat one? Why must it cost $4.95 for a beefed up granola bar? All of these questions led me to conclude that I should just make my own. As usual.
In this bowl is a plethora of yummy, healthy ingredients that will soon be pressed into one giant delicious bar. Nuts, oats, coconut and of course cinnamon (because its never a bad idea) are the base for this recipe. 
Coconut Oil gets melted down, although if it's summertime in your neighborhood, it may already be liquified in your pantry.
That melted oil gets mixed with Almond butter, honey and greek yogurt - Yes! yogurt. There's calcium too!
The liquids get mixed in with the dry ingredients, tossed with a good sized handful of dark chocolate chips and a sprinkle of vanilla protein powder, preferably plant based.
Next, press the mixture, rice krispy style, into a baking dish lined with parchment paper. And into the oven they go for the first bake.
Next, the whole thing gets carefully sliced (they do like to be crumbly) into rectangular bars. You could also do squares, or triangles if you feel fancy. The bars get baked a second time to crisp up the outsides and create a more bar-like texture. 

Store them in the fridge in an airtight container with sheets of waxed paper between any layers. You can freeze them as well and just set one out a few hours before you plan to eat it. Maybe they don't have any of those big health words, but they sure do taste good and will satisfy your snack craving and sweet tooth!

Enjoy.

Chocolate Chip Coconut Protein Bars
Adapted from Healthy Green Kitchen

3 C whole oats
1/2 C sunflower seeds, shelled
1/2 C slivered almonds
1/2 C unsweetened coconut flakes
1 tsp. ground cinnamon
1 tsp. sea salt
1/4 C brown sugar (optional - you could add just a tad bit more honey)
1 C plain greek yogurt
1/4 C + 2 T honey
1 C natural creamy or crunchy peanut butter or almond butter or a combination of both
1/4 C coconut oil, melted
1 tsp. vanilla
1/2 C dark chocolate chips
1/2 a single packet of vanilla flavored plant based protein powder

Preheat the oven to 350 degrees.
Combine all of the dry ingredients in a large bowl through the brown sugar, set aside. In a smaller bowl, combine the wet ingredients and mix together thoroughly. Add the wet ingredients to the dry and mix well to combine and coat all of the dry ingredients. Using plastic wrap, press the mixture into a baking dish lined with parchment paper. 
Bake for 15 minutes, then remove from the oven and allow to cool until okay to handle. Lift the whole thing out (using the parchment paper) onto a cutting board. Slice into whatever shape bars you'd like, then place onto a baking sheet also lined with parchment. Bake again for another 15 minutes, watching closely in the last 5 minutes to prevent burning on the edges.
Cool and store in the refrigerator or freezer until ready to eat.


Tuesday, August 20

Easy Chicken Tikka Masala

I adore Indian Food, but it's one of those cuisines that I feel consistently evades home cooks. It could be the incredible library of spices and herbs Indian food requires, or maybe the idea that you have to use fancy tagine-like equipment. Whatever it is, I'm here to tell you that you can have Indian at home, and this recipe uses things you probably already have in your kitchen. This is my easy version of Chicken Tikka Masala.
First, you need to marinate your chicken in some spices, yogurt and lemon juice.
It should look like this and the chicken should sit in it for about an hour or so. Then, you can simply grill the chicken or cook it in a nonstick skillet until golden on each side. The sauce for this recipe is just as simple, saute some onions and minced jalapeno, add garlic and a few more spices, tomato sauce and coconut milk and your meal is almost ready to eat.
Once the sauce is finished, throw the chicken in to make sure it's heated through. I like to steam some jasmine rice and brussell sprouts while I whip up the sauce and then poor the chicken over the top of both. I also buy garlic Naan form either Whole Foods or Trader Joe's for scraping every saucy bit left in the bowl.

Easy Chicken Tikka Masala

For the Marinade:
3/4 C plain greek yogurt
2 T fresh squeezed lemon juice
1 1/2 tsp. cumin
1/2 tsp. cayenne pepper (more if you like it super spicy, less if you don't)
dash of cinnamon
1 tsp. salt
1 tsp. ground black pepper
1 T fresh minced or grated ginger root
2 boneless, skinless chicken breasts, cut into 1 inch cubes

For the Sauce:
1/2 T olive oil
1/2 small onion, chopped
1 medium jalapeno, seeded and minced
1 garlic clove, minced
1 T fresh minced or grated ginger root
2 tsp. cumin
2 tsp. paprika
dash of curry powder
1 small can tomato sauce
1/2 a can of light coconut milk (plus more if a thinner or less spicy sauce is preferred)
salt and pepper to taste

Combine all marinade ingredients in a medium bowl and set aside for 1 hour.
Heat a grill pan or nonstick skillet to medium heat. Grill or pan sear the chicken until golden brown on each side (this should take about 3-4 min per side). If using a skillet, cook the chicken in two batches, being careful not to overcrowd the pan and to prevent boiling. Set the cooked chicken aside.
In a small saucepan, heat the olive oil over medium heat. Add the onion and jalapeno, sauteing until slightly golden, about 5 minutes. Add the garlic, ginger and spices, cooking for one minute more until you can smell them. Turn the heat down and slowly add the tomato sauce, stirring as you add it. Poor in the coconut milk, salt and pepper to taste and simmer the sauce for about 10-15 min, adding the chicken into the sauce about 5 minutes before it's done. The sauce should be pretty thin, but if it gets too thick, add more coconut milk.
Serve over jasmine rice with your favorite vegetable and naan.

Enjoy!

Tuesday, July 16

Homemade Ricotta Cheese

Did I believe that one day I would inevitably wind up making my own cheese? Yeah, I did. Did I believe that making my own cheese would not only take less than 20 minutes, but would entirely change my view of cheese forever? Absolutely not. 
I have to thank Pinterest for this epiphany, and for making my Lasagna taste better than ever with fresh scoops of this deliciously salty and creamy homemade Ricotta cheese. It takes 4 ingredients, a thermometer and some cheesecloth. Start by heating your dairy in a saucepan over medium heat.
Look at this magic happening right before your eyes. Once you reach the desired temperature, the curds (the solids) begin separating from the whey (the liquids)
Then all that's left to do is drain and salt the cheese before jarring it up and spreading on toast.
And there you have simple, beautiful, homemade ricotta. The world is your oyster, go make some cheese! Next, I think I'll try the vinegar instead of buttermilk method, and maybe add in some flavors like lemon zest or fresh herbs. 


Homemade Ricotta Cheese
Adapted from Framed Cooks

4 C whole Milk
1 C Buttermilk
1/3 C Heavy Whipping Cream
1-2 tsp. Sea Salt, per desired taste

In a medium saucepan, heat the liquids over medium high heat with a candy thermometer attached to the side of the pan. Carefully bring to a boil, stirring occasionally and watching to prevent boiling over or scorching.
When the liquids hit 185 degrees, the curds and whey will have begun to separate, this should take about 10 minutes. Once separated, remove the pan from the heat and use a slotted spoon to transfer the curds into a colander lined with cheese cloth, a clean dishtowel or a thick layer of paper towels. With each scoop, add a dash of salt, gently mixing it in.
The liquid will drain off and in about 5 minutes, you'll have perfect cheese. If you like your ricotta thicker and dry, allow it to drain longer, maybe even overnight. You can always add in a tablespoon or so of milk to moisten it again. Store in a jar in the fridge for about a week (if it lasts that long :))

Enjoy!


Monday, May 20

Whole Wheat Vegetable Lasagna

I don't often make Lasagna, but this one is just too good to pass up. The veggies act as the perfect meat replacement and the combination of 4, yes FOUR, different cheeses make this an ooey, gooey, stringy delight. 
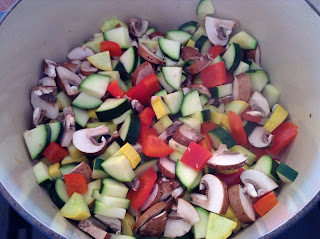
Cook down a colorful array of vegetables. I chose zucchini, yellow squash, bell pepper, onion and mushrooms.
Mix ricotta cheese with herbs, an egg and some parmesan cheese.
Look! Four Cheeses. Ricotta, Shredded Parmesan, Provolone and Mozzarella. Yes, I like to shop at Sprouts.
Veggies cooked down with homemade marinar sauce. You can use whichever marinara recipe or store bought version you like.
Layer it up: Start with a good scoop of the vegetable sauce. 
Then a few noodles. My noodles were too big for my casserole dish, so I split them to size before boiling them.
Start spreading the ricotta mixture, using about a third of what you have.
Now goes the layer of provolone.
Followed by a second layer of sauce, noodles, ricotta, and then a layer of Mozzarella instead of Provolone. Finish with a third layer of sauce, noodles, ricotta and mozzarella, topped off with the fourth cheese, the parmesan.
Bake this bad boy for 30 minutes in a 350 degree oven, switching to the broiler at the end to brown and bubble the cheeses. I make this small version because there are only two of us, but you could easily double it to make a traditional sized lasagna.

Whole Wheat Vegetable Lasagna
1 box whole wheat veggie lasagna noodles, boiled (I only needed about 8 noodles from a box of 20 or so)
1 jar homemade or store bought marinara of your choice
1 T olive oil
1 medium yellow onion, chopped
2 medium Zucchini, chopped
1 Bell Pepper, chopped
1 Yellow Squash, chopped
1 C cremini mushrooms, chopped
1-2 cloves garlic, minced
7-8 large leaves basil, chopped
splash of white wine
1 tsp. italian seasoning
4 slices provolone
1/2 ball of mozzarella sliced

Ricotta Filling:
1/2-3/4 C ricotta cheese
1 egg
1/4 C parmesan, shredded or grated
1/2 tsp. italian seasoning
1/2 tsp. ground black pepper

Mix together the ricotta filling in a small bowl and set aside. In a large heavy bottomed pan, cook the veggies in 1 T olive oil over medium high heat until browned and tender, about 15 minutes. Add the garlic, cooking until fragrant for 1 minute. Add the basil and italian seasoning, then the splash of white wine to deglaze the pan and cook for another 2-3 minutes. Turn the heat down and add the marinara sauce, stirring to combine. You may want to salt and pepper the sauce, but taste it first.
In a casserole dish, layer the lasagna as follows:

Layer One:
A third of the sauce
Noodles to cover the sauce
A third of the ricotta filling (spreading gently)
The 4 slices of provolone
Layer Two:
Half the remaining sauce
Noodles to cover
Half the remaining ricotta filling
A layer of mozzarella
Final Layer:
The rest of the sauce
Noodles to cover
The rest of the ricotta filling
The rest of the mozzarella
1/4 C parmesan cheese sprinkled over the top

I like to alternate the direction of the noodles each layer. So, the first layer, they are horizontal, the second, they are vertical, and so on.

Bake the Lasagna at 350 degrees for 30 minutes, broiling the cheese at the end until golden and bubbly. Allow to sit for about 5-10 minutes outside the oven before cutting into it.

Enjoy!


ShareThis